Our lines tell different stories depending on their weight/thickness. Generally speaking, our eyes gravitate towards the thickest lines first. These are great for outlining silhouettes, defining areas of shadow, and bringing attention to an object. Thinner lines generally define the smaller details and highlight areas of light.
M A T E R I A L S - P A R T T W O
Line Weight & Expression
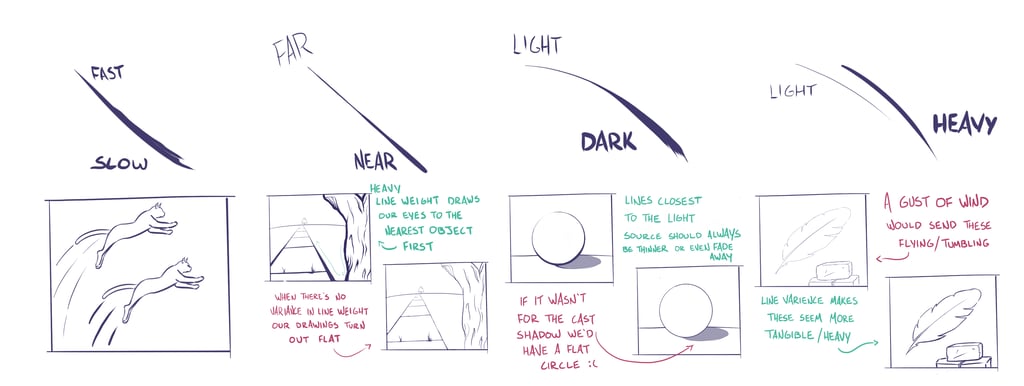

Line work won't always be easily distinguishable in final pieces. But, when you sketch, it's best to start light and work your way up to bolder lines where necessary. Setting apart areas of light or shadow with line weight helps greatly later on during the rendering process. If this concept doesn't make complete sense, that's okay! This is only an introduction, we'll go more in-depth later on.
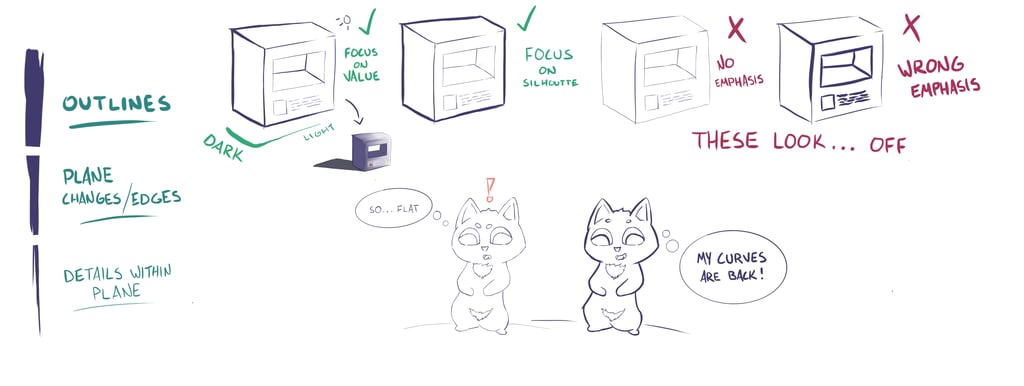

At some point, if you haven't already, you'll hear about "dynamic" linework & figures. Varied line weight plays a big part in achieving this dynamic look. Lines that don't taper (go from thick to thin) are generally going to look quite rigid and dull. The best and most fun way to practice line variance is with a brush or brush pen! They're made specifically to allow for quick changes in line weight.
W A T C H V I D E O
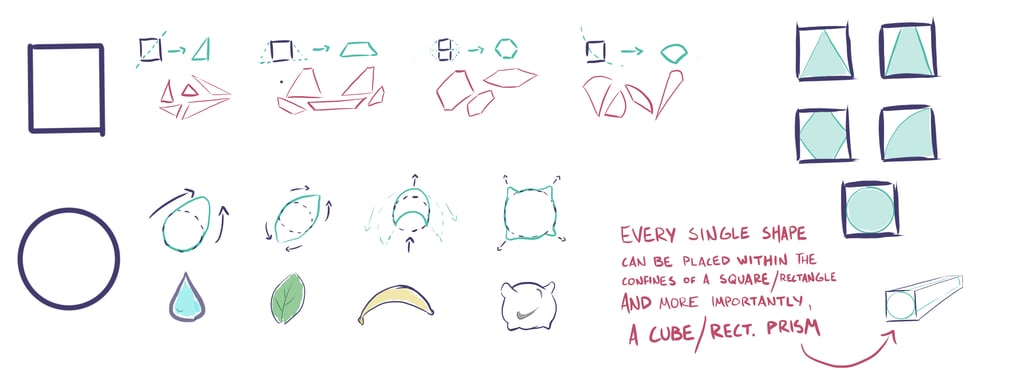
There's two main shapes that we'll be dealing with to construct absolutely everything: rectangles & ellipses. Triangles are pretty cool too, but I like to look at them as rectangles cut in half.
Connected Lines (Shapes)
Repeat after me: everything starts simple. I want you to get used to imagining complex shapes framed within rectangles and/or ellipses. The key to becoming a great draftsman is knowing how to start small and then work your way up.
The next two sections will dive a little into perspective (how shapes/objects look when drawn from various angles). I do not expect you to get it right away. Accept what I explain to you, play around with the concepts, and move on. Chances are it'll make way more sense later down the road.
Rectangles
Made up of four straight lines, it is by far the best shape to try to understand perspective with. Have your phone nearby? Wherever it is, grab it and open up your camera. Next, hold out a flat piece of paper and take a picture of it straight on. Now, tilt the paper forward a little and take another picture. Repeat at least 3 more times.
Ellipses
Ellipses can be a real pain to get right. I want you to understand how they rotate and shift in space but I never expect you to be able to freehand them perfectly.


The first picture looks like a regular ol' rectangle/paper right? Each following rectangle, however, starts to slant inwards as well as "squish" in on itself. If we try to do this same exercise with our eyes it'll be close to impossible to notice the slant and the squish. This is because our eyes are spherical and specifically made for taking in a three-dimensional world. Pictures and drawings, on the other hand, are 2D representations of our 3D world.
This is one reason reference images are so useful. They give us that "2D" information that our naked eye doesn't pick up on unless we train them to.
Another tool we can use to understand perspective is guidelines. Take a blank piece of paper and bisect it (split it in half) four times like shown below.


These guidelines act as reference points & make it obvious that we're still looking at a rectangle no matter the orientation of the rectangle. Now: bend, rotate, & fold the paper as you take pictures of it. Then draw the paper as you see it on the photos. Guidelines included.
You'll notice that I've also introduced vanishing points in the image above. A vanishing point is simply a point in the far distance where many sets of lines converge and, well, vanish! In real life, there's a near infinite amount of vanishing points. Every single object has lines that shoot out from its edges. These lines--unless perfectly parallel--would eventually converge. In drawings, however, we tend to simplify to just 1, 2, or 3 VP's. We'll cover VP's and perspective more in-depth later on. For now, let's just try to understand how multiple lines and shapes can converge towards one VP.


Roads are a great real-life example of lines converging towards one vanishing point. The road obviously doesn't just stop at that point, we simply can't see further because it is past the horizon line. This horizon line is always dependent on eye level. If this picture were to be taken from higher up, the horizon would fall lower in the frame. And vice-versa, if we were to lay on the ground and take the photo, the horizon line would be higher in the frame.
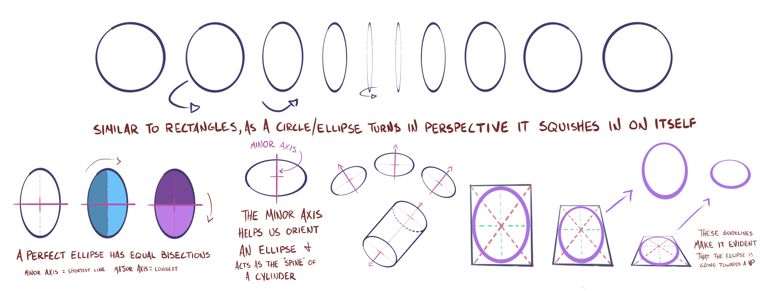

It's hard to put into words how exactly a circle/ellipse behaves in perspective. It's something that will become more intuitive with experience. For now, a good exercise is to practice placing ellipses of different sizes within the confines of a rectangle with guidelines.
Methods have been devised to help nail these "circles in perspective" as accurately as possible. I don't really bother, "good enough" ellipses are fine. If, for some reason, I really need a perfect ellipse I'll have photoshop or some other tool help me.
Math terms and overly-technical grids aren't my cup of tea. If you're interested in diving deep into technical drawing check out Scott Robertson's "How to Draw" series.
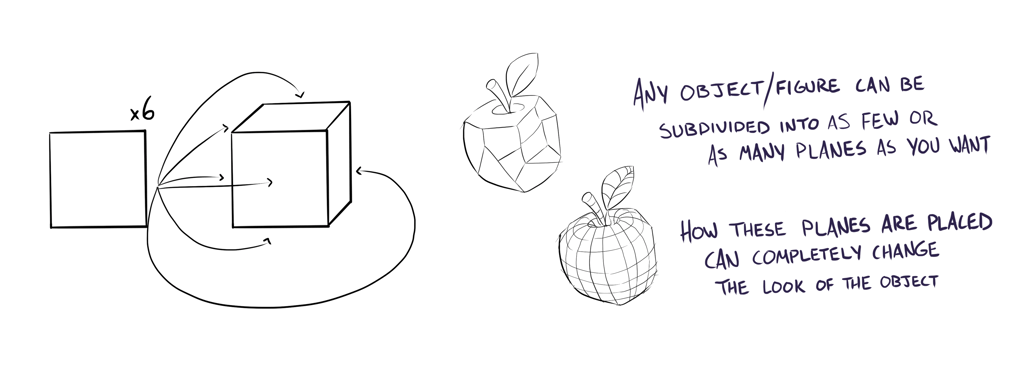
No, not the type that fly. In art, a "plane" refers to one of the many possible faces of a 3D object. A cube, for example, has 6 faces or planes.

Planes
I'm very briefly introducing this concept so that you have it in the back of your mind. Understanding how just one plane rotates and morphs in 3D space will make it way easier to then move on to cubes, apples, and eventually, complex life forms.
Remember: the idea isn't to execute these exercises to perfection. Do them to the best of your ability and move on to the next part. You'll have plenty of opportunities to improve in later exercises.
Assignments
Technical
Creative


The Compass of Plane Rotation
Mindless Shapes + Weight
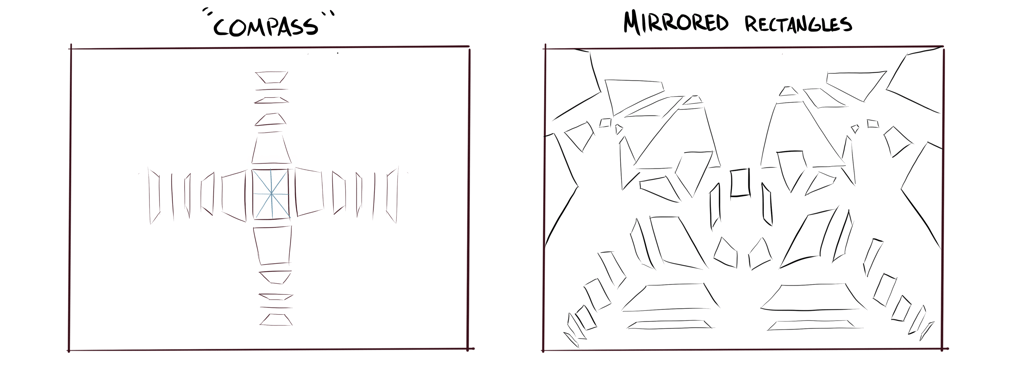
Understand how a piece of paper looks from any rotation? Let's put it to the test. Using the ghost method from the previous chapter, take a page & make a "compass" of rectangles like the one below. Add guidelines.
On a separate page, place a rectangle in the middle. To one side, draw another rectangle of differing size and rotation. Mirror that same rectangle on the other side. Repeat until the entire page is filled with rectangles bending and twisting in space.
Learning to mirror shapes now will enhance your spatial awareness and help you better pick up on proportionality in the future.
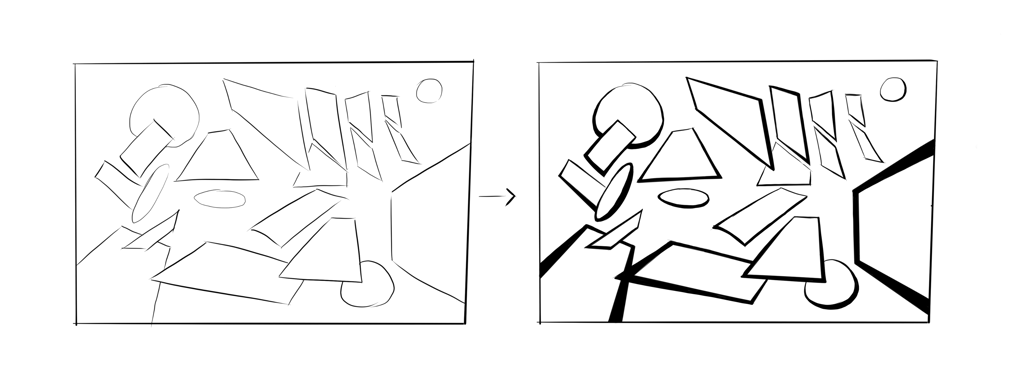
Start by making 20 or more shapes with thin, consistent line weight & varying sizes. Don't think about it. Throw em' down. Anywhere.
Next, use what you've learned about line weight to add depth and interest to the drawing. Keep in mind that the further a shape or side of a shape is from a viewer, the thinner the lines will be.
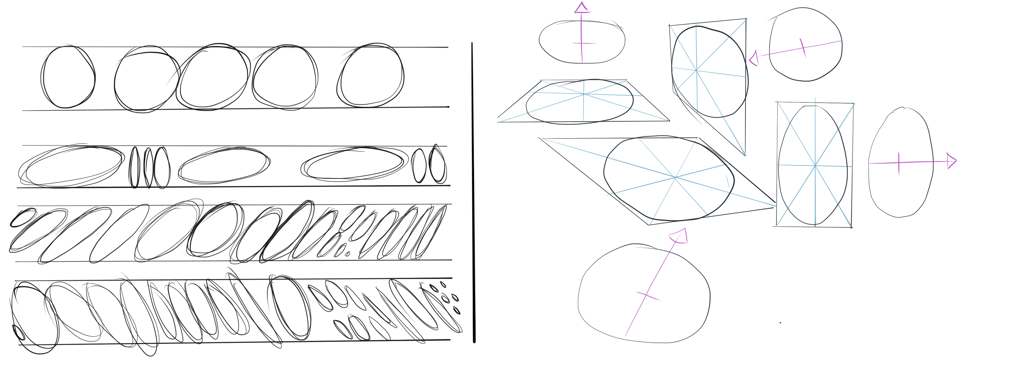
Ghosted & Framed Ellipses
We are NOT aiming for perfection here. Recreate the first exercise below: Ghost the shape of the ellipse you want to lay down and then go back over it two more times. Make sure to get a full range of sizes and rotations.
For your second exercise, lay down a few rectangles with guides in various perspectives. Within these frames, make ellipses that touch all 4 sides of the frame. Next to the frame try to make the same ellipse. This will start training your eye to recognize how an ellipse looks in perspective.

Leading Shapes, Weight & VP
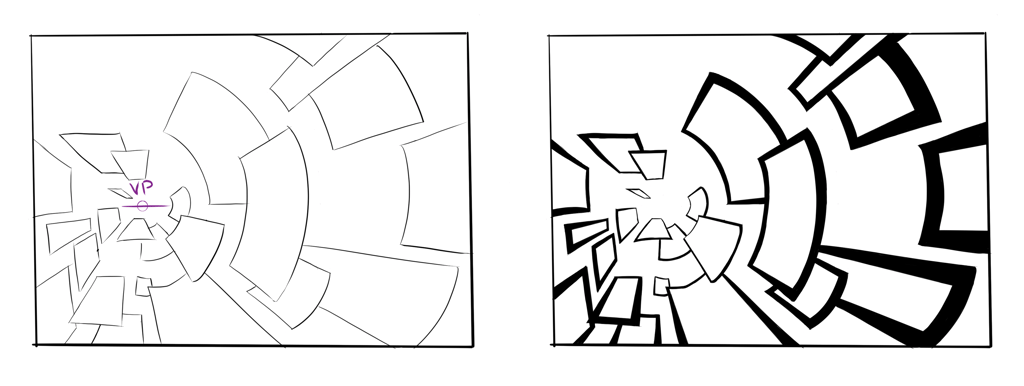
Just like the leading lines exercise from part one, there should be a clear direction & flow to your shapes. This time, I'll have you use a vanishing point. You can put it anywhere on the page as long as every shape matches up to it.
Use line weight to imply which shapes are closer to the viewer and which ones are really far into the canvas.
