
The Importance of Thought & Patience
Many students attempt to dive right in and put pencil to paper, they're impulsive. They have an image inside of their head that they desperately want to get out onto the page RIGHT NOW! I get it. Even I, the great Yoru, was guilty of this as a young kitten. But we should stray away from this impulsivity. Every mark should have thought and purpose behind it.
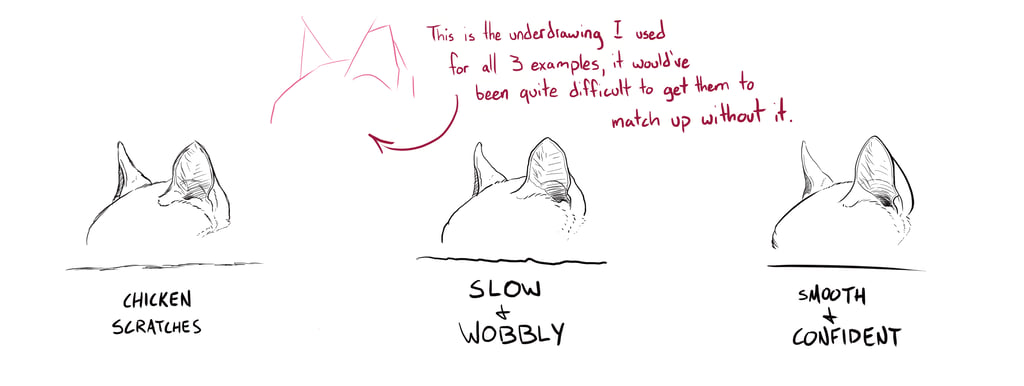
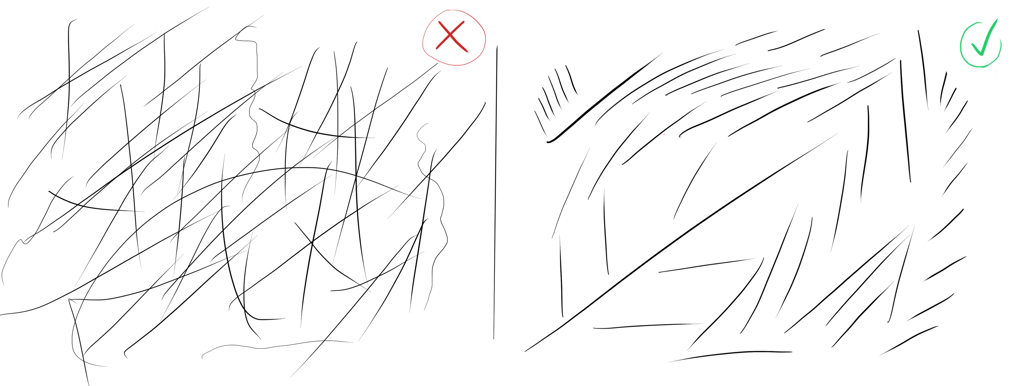
When sketching and drawing, many beginners fall into making either chicken scratches (many lines on top of each other) or slow and wobbly lines. This leads to messy, hard-to-read sketches and drawings that look unpolished. Ideally, we want to always create smooth and confident lines. In the case of fur, many individual lines next to each other help imply texture. But even on animals, smooth and continuous lines should define the overall silhouette.
M A T E R I A L S - P A R T O N E
As we progress through the elements I'll continue to stress the importance of planning out your drawings both in your mind and on the page. We're also going to take things slow and steady. Similar to how we must crawl before we can walk, we must know how to draw & manipulate a cube before we can draw a vehicle. So let's learn how to make a proper line!

W A T C H V I D E O
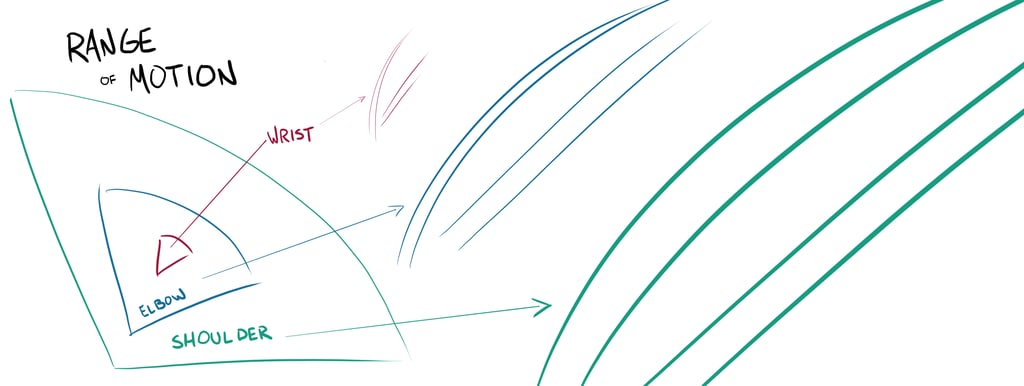
Obtaining full control of our arm and wrist can be really frustrating when we're starting out. There are certain muscles that quite literally need to get stronger before it becomes easy for us to draw with our shoulders. This isn't to say that we need to go out and start doing bench presses but we must make a conscious effort to use our entire arm when drawing. Wrist, elbow, & shoulder.
Many of us have spent years writing from our wrists, so naturally, we tend to want to draw in the same way. Don't. Using just our wrist limits our range of motion and makes us susceptible to injury. I've known artists that have given themselves some pretty nasty carpal tunnel from constantly abusing their wrist. In extreme scenarios, our hands can even lose their ability to hold a pencil.
Using our entire arm takes some getting used to, but it's quite simple to get started. Normally, we tend to rest the full weight of our hands on whichever surface we're writing on. When drawing, however, your entire arm should be "floating." This allows your elbow and shoulder to pivot so that it can help you make large & continuous lines. For extra support, you can partially rest the side of your hand on the page so that it smoothly drags across the page as you make a line.
Drawing from the Arm
The diagram above is not 100% accurate but it gives you an idea of how little your wrist can do well. While your wrist is great for detail work and really tight curves, your elbow and shoulder are capable of so much more. In fact, you might never use the full extent of your shoulder's range without diving into mural work!
If your arm/shoulder gets sore while drawing, that's a good sign! It means your muscles are rebuilding and getting stronger! Push through! Don't stop trying just because it's awkward or takes more effort. There will be much harder challenges ahead.

Controlling how much pressure we draw with takes some training. Luckily, most of you already use the correct pencil grip since you learned it while learning how to write. This is called "The Tripod Grip" & it uses your thumb, index, and middle finger to hold onto your drawing tool.
Hand Grip & Pressure
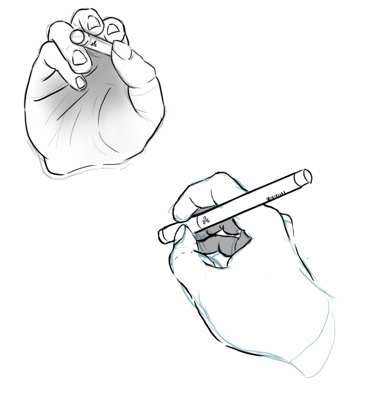

Learning how to control pressure starts with being fully aware of how aggressively we're used to gripping a pencil. We want our grips to be as soft and gentle as possible. Our hands are quite strong, but when we're drawing we only need enough strength to hold a feather not a whole gallon of water. Practice your pressure by lightly holding a pencil above a page while making a back and forth motion. Then, lower the pencil slowly so that only the very tip grazes the page. The lines should be almost invisible. From here you can start to add more pressure and work up to darker and darker lines.
Dot & Line
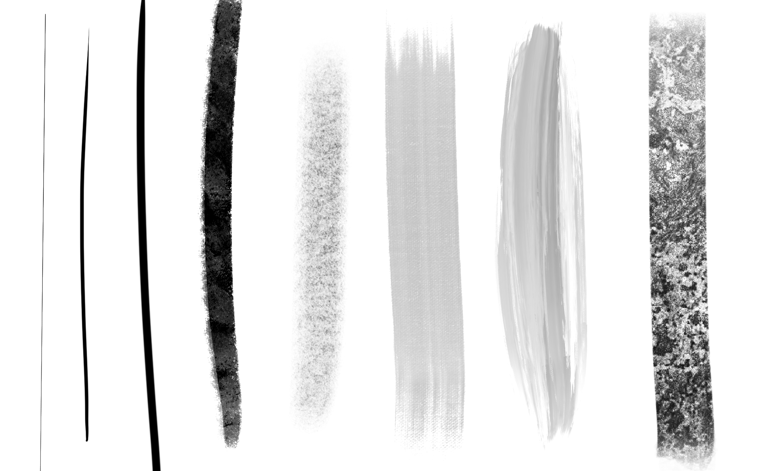

These strokes can be short, large, thick, thin, or a combination of these attributes. They can be individually distinguishable like the ones shown here or meld into each other during blending/shading. Strokes can be close together or far apart. They can intersect, connect, or stand on their own. Let's focus on stand-alone lines first.
If we break things down to their very core all we're left with are huge collections of lines/strokes and dots/pixels. Put two or more of those dots together and we have a line. It doesn't matter what medium we use, all we're ever doing is making a large variety of strokes.
This method forces us to think & plan out the marks we make. It removes unnecessary lines and leaves us with clean, crisp linework. This method is not meant for sketching. Most artists benefit from staying loose and sporadic during their sketching phase. But after that ideation phase is done, our lines should be placed much more purposefully. The method can be broken down into 3 steps:
1 - Think
2 - Ghost
3 - Execute
The Ghost Method
Think
For now, we'll focus on one line at a time. Eventually, however, you'll want to have entire shapes and forms in your mind before putting anything down on the page. If you're always figuring out your lines as you go, your end result will always be a surprise. You won't really know what you're drawing until it's drawn. That's why it's important to plan ahead if you hope to one day draw exactly what YOU WANT and not the randomness that comes after many unplanned, half-thought-out strokes.
Ghost
Ghosting is the act of going through the motion of drawing a line without actually touching the page. This is done by hovering over a starting point (in your mind or on the page) and moving to the endpoint as if you were actually making the stroke. You repeat this a few times and then execute.
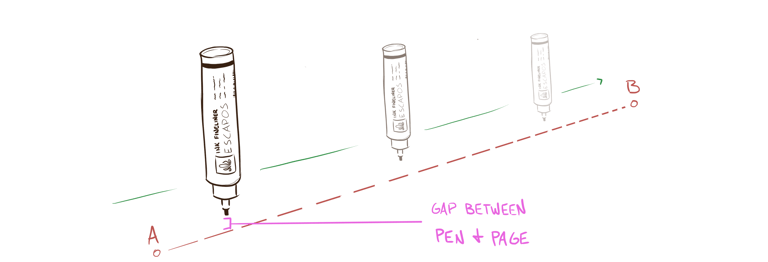

This helps your arm get an idea of how to make the stroke before putting it down and reduces mistakes caused by jumping straight in. There's not a set amount of times that you should repeat a ghost. Focus on getting comfortable with the line you're about to make. Don't freeze though. These kinds of ghosts aren't meant to scare you. Ghosting should take less than 5 seconds.
Execute
Make the mark. You've done all your thinking and preparation. Don't hesitate. Don't second guess. And please, don't fear mistakes. Ghosting helps but it does not guarantee that your lines will be perfect. As long as you've confidently made a smooth & uninterrupted stroke, you've succeeded. If you missed your endpoint that's okay. The accuracy of your lines will improve with time and practice. Master artists don't nail all of their lines so you should never expect to either.
Let go of perfectionism or you WILL burn yourself out.
Each part of a lesson will have at least one technical exercise and one creative exercise, sometimes more. The idea isn't to execute these exercises to perfection. Do them to the best of your ability and move on to the next part. You'll have plenty of opportunities to improve your line quality in later exercises. All of these exercises should be done TRADITIONALLY unless stated otherwise. I make most examples digitally to keep the website looking clean and speed up the time it takes to make lessons.
Assignments
Technical
Creative


Superimposed Lines
Mindless 50
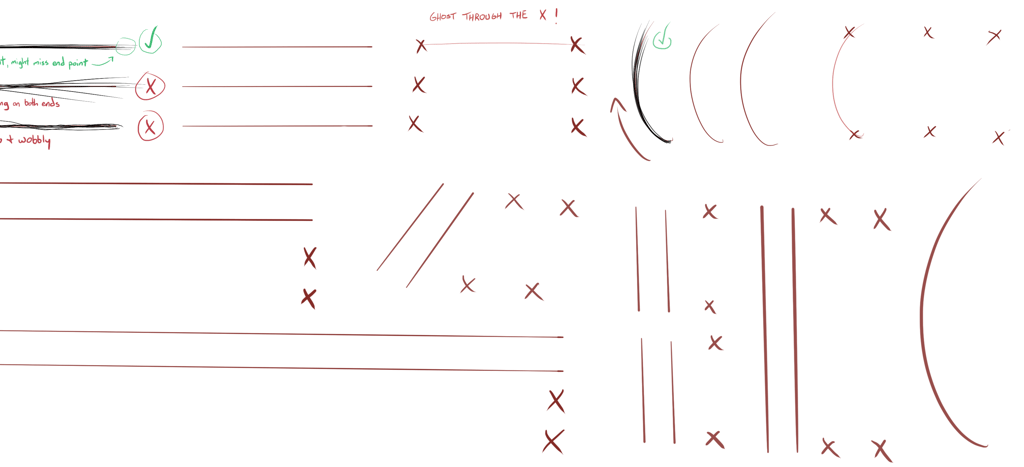
Real simple, put down one line and then go over that same line 7 times. Feel free to use this layout or make your own, but make sure to have varying lengths & some curves in there. You can use a straight-edge for your first few beginning lines. Practice ghosting your first line as well! Use X's to mark your points like outlined below. Think. Ghost. Execute.
The goal is to have all 7 lines match each other as close as possible.
Draw 50 random lines that don't touch each other. That's it. Don't think about where to place them. Let them land wherever they land. Oftentimes, great ideas come from the most random places.
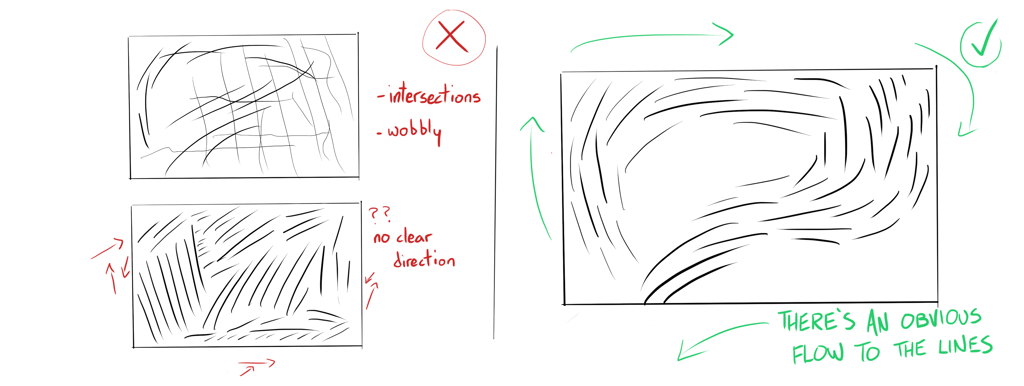

Within a "frame" draw 50 lines that don't touch each other and also create some visual interest. The way the lines are placed should lead your eyes around the frame somehow. Left to right. Corner to corner. Towards the center. Up to you.
Leading 50
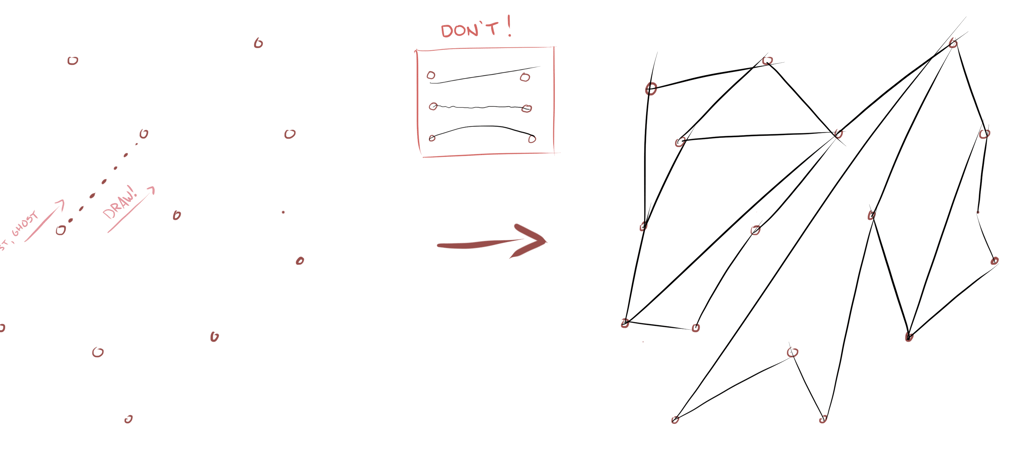

Ghosted Lines
Scatter 16 dots (or more) all over an empty page. These dots will represent start and end points.
Using the ghost method, connect all the points together. Again, we're focused on getting smooth & confident lines that are made with the full extent of our arm. WORK OUT THOSE SHOULDERS!


